Linux Command Line For Beginners
This is an introductory course for everyone who wants to become familiar with Linux. After you read this course, you will know about:
- Introductory Tips & Tricks
- The Linux File System
- Moving around in directories
- Looking into directories and files
- Manipulating files and directories
- Looking for files
- Archiving files and directories
- Managing processes and services
- Installing packages and using PPAs
- Managing files/directories permissions and ownership
- Managing users
- What Next?
Introductory Tips & Tricks
I'll start off with some tips that you can use very often when working in the terminal.
Tab completion
The first one is tab-completion. This means that you can write part of the name of a command and a file and the terminal will fill in the rest, if it knows. To try it out, write apt-g in the terminal and then press the Tab key. The terminal should complete it to apt-get.
If there is more than one option, the terminal will display all of them. To test that, write apt- and then press Tab.
Command history
Maybe you know that you can access commands that you ran previously in the terminal by using the up arrow. You can try it out now, if you didn't know. Another useful thing is that you can search the command history. To do that, you press Ctrl and R at the same time and the prompt will change. You can then enter some of the contents of the command. On the right, you will see what command the terminal found. To keep it, just press the right arrow key.
The Linux File System
The Linux file system is structured like a tree with the branches facing downwards and looks like this: /
bin boot dev etc home lib media mnt opt proc root run sbin sys tmp usr var
Each of these is a directory (or folder in Windows terminology) and may contain files. For example, the /home directory contains directories for users of the OS. These directories have the same names as the users. For example, my username is lucian, so my home directory has the same name. From the other directories, I'll mention only the ones that are the most important to know right now. These contain:
- /etc - configuration files for nginx, apache and most other programs on the system
- /tmp - temporary files that can be removed when a program stops
- /usr - installed applications
- /var - logs
Moving around in directories
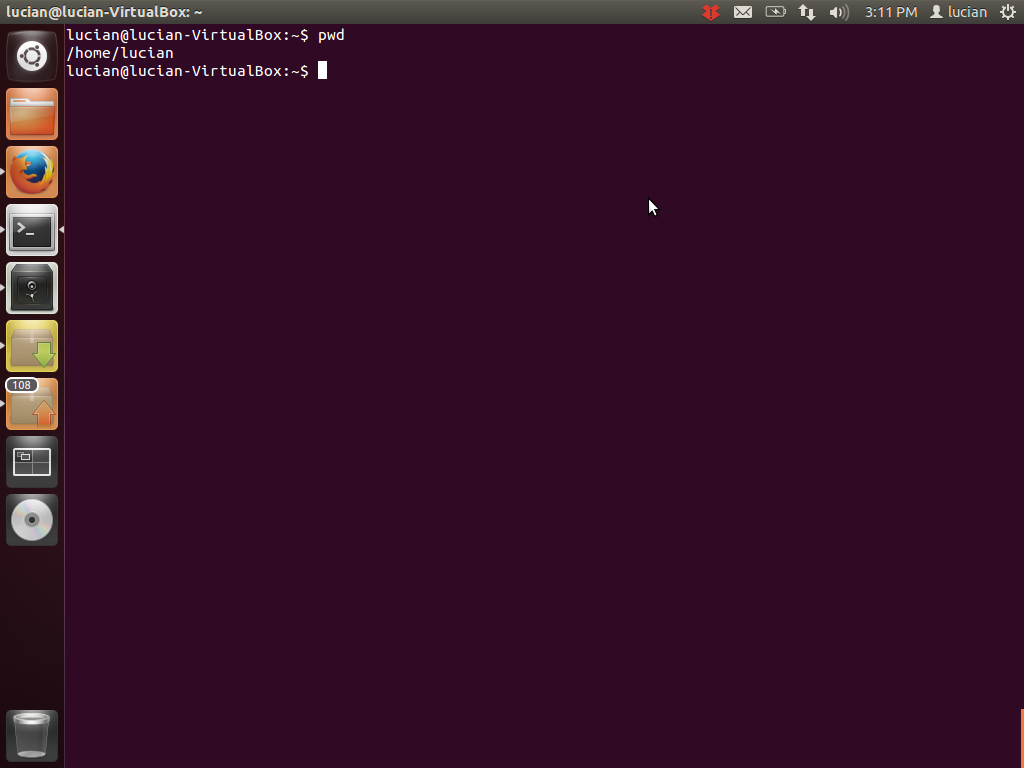
pwd
| what it does: | prints the working directory |
|---|---|
| syntax: | pwd |
The working directory is the directory you are currently in and it should be displayed in your prompt. If you imagine the tree that we talked about above, an owl would be sitting on the working directory. When you open the terminal, you are in your home directory by default. You are probably confused right now, because you don't see where the working directory is displayed in the prompt.
For that, I need to tell you something about the home directory. Because it's used a lot, there are a few shortcuts to refer to it. One of these is ~, which is what you see in your prompt between : and $. You will see it change, when we learn how to change the working directory. Also, sometimes you will see it used as ~/ in examples. It's the same thing, just like /home and /home/ are the same thing in most cases.
In general, pwd is useful when you want the absolute path to the working directory. (I'll explain absolute paths a little later).
cd
| what it does: | changes the working directory |
|---|---|
| syntax: | cd <path/to/dir> |
For example, to change the working directory to /usr, we run cd /usr. A path can be of two types, which are explained below.
Absolute and relative paths
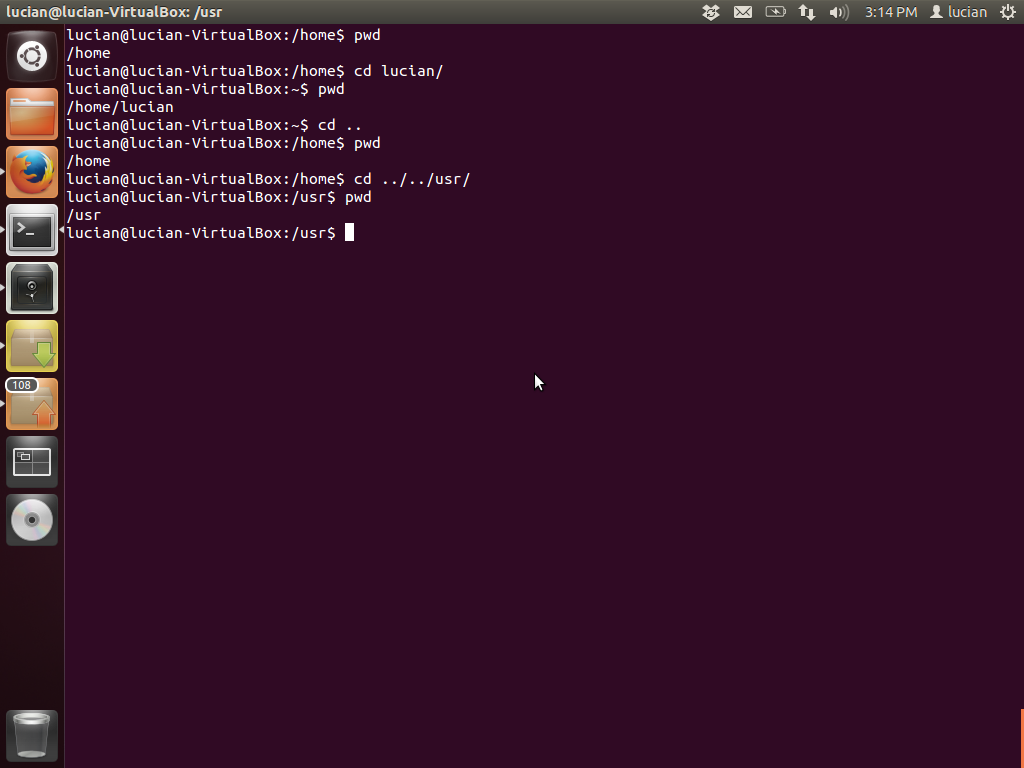
A path is absolute if it starts from the root of the file system. So if a path starts with /, then it's an absolute path. Relative paths don't start with a slash and are relative to the current directory. If you want to move to a directory found in the current directory, you simply use its name. For example, if I am in /home/ and want to go in my home directory, I do cd lucian.
To refer to the directory above the current one, you use .. (two dots). Now I'm in /home/lucian and I want to go to /home. For that I do cd ... What if I want to move to /usr? What does the relative path look like? I need to go two directories up to the parent of usr and then inside it. That means I use cd ../../usr. First .. refers to home and the second to /. Imagine the tree and going up towards the root and then down into usr.
There are two more tricks to remember about cd. Running cd without a path makes the home directory the working directory. cd - makes the previous directory the working directory.
Looking into directories and files
ls
| what it does: | prints the contents of a directory |
|---|---|
| syntax: | ls <options> <path/to/dir> |
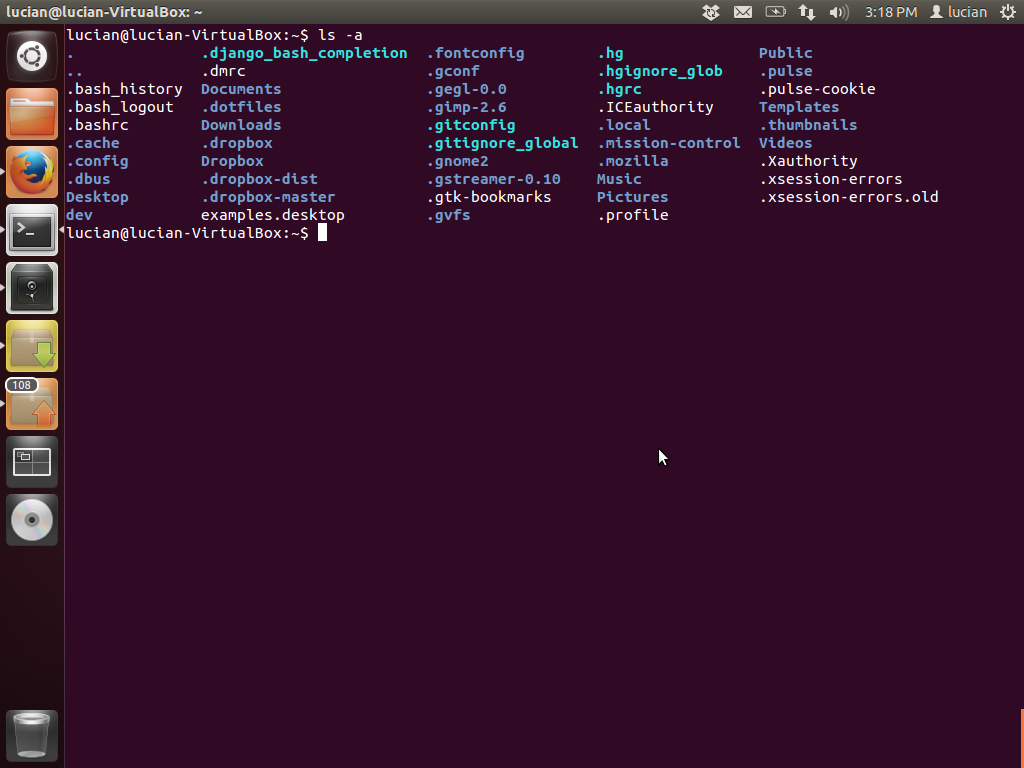
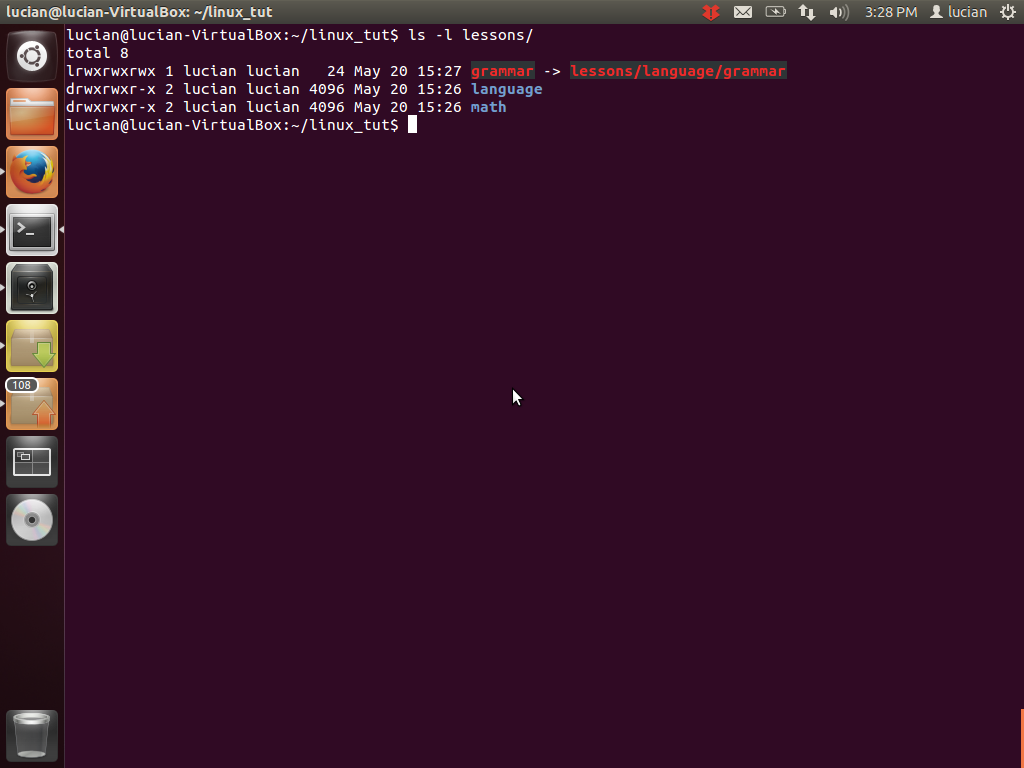
If you want to see the contents of your home directory, you run ls ~. The output is the names of the files and directories.If we want to get more details, ls has a few options. First one is -l. If you run ls -l, you'll get a table of information, like this:
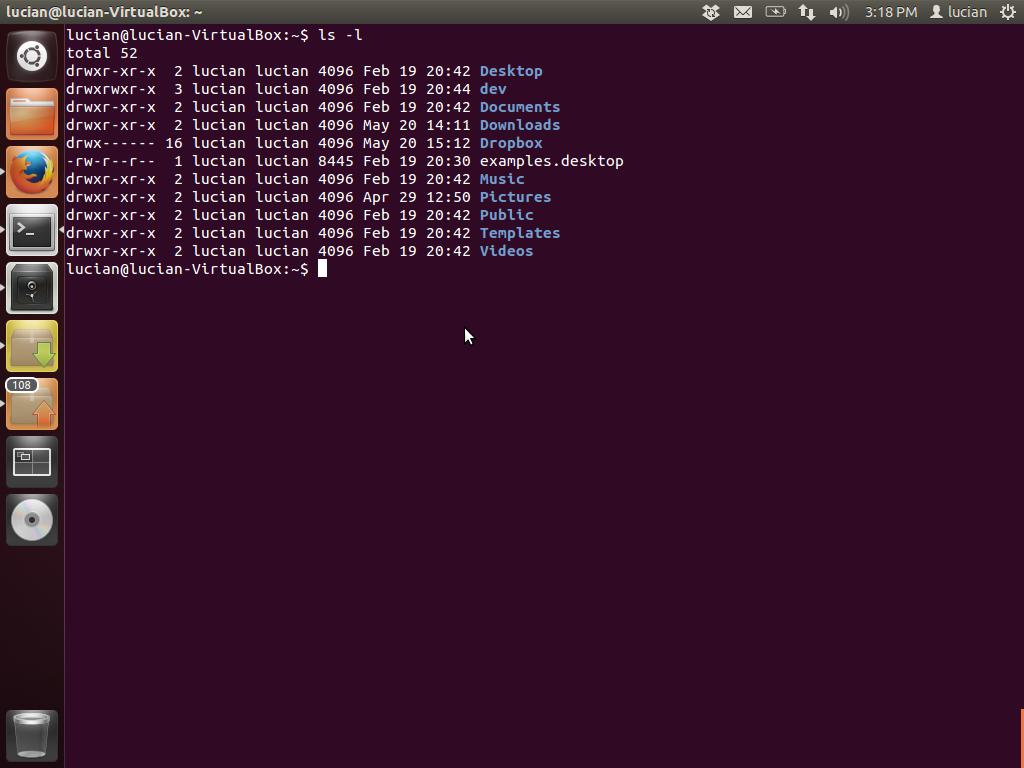
Some of the columns in the output are more obvious, others less so. We will explain each column when we reach the specific chapter. The short version is that the first column shows the type of file and permissions, the second one shows the number of hard links pointing to the file or directory, the third and fourth columns display the user and the group who own the file, the fifth one shows the size, and the sixth one the date and time when the file was last modified. Most of the time you will care about columns one, three, and four.
less
| what it does: | displays the content of a file |
|---|---|
| syntax: | less <path/to/file> |
less is the perfect tool if you want to look into a file without needing to modify it. To look in the file .bashrc which is found in your home, run less ~/.bashrc. After opening a file, you can navigate up and down by using the arrow keys (or j for down and k for up). To exit less press q. Play around with it, so you get used to the keys.
An important thing that you need to realize is that the commands I mentioned (ls, less) take a path as an argument. This means that you can see the contents of any directory on the system, without changing to it first. For example, you can do ls /etc/ or ls /var/log. These commands take both absolute and relative paths.
Manipulating files and directories
After we learned how to look into files and directories, let's find out how we can create, edit, remove them and other related operations.
mkdir
| what it does: | creates directories |
|---|---|
| syntax: | mkdir <path/to/new/directory> |
Let's create a directory where we can experiment for this tutorial:
mkdir linux_tut
We can check to see if the directory was created using which command? If you said ls, you were correct. Make it the working directory and then create another directory called "lessons" inside it:
cd linux_tut
mkdir lessons
Let's create two other directories inside it:
mkdir lessons/math lessons/language
As you can see, we can create more than one directory at the same time.
touch
| what it does: | creates empty files OR updates the timestamp of existing files |
|---|---|
| syntax: | touch <path/to/file> |
To create some files in the directories we created above, we run:
touch lessons/math/algebra lessons/math/grammar
touch lessons/language/geometry lessons/language/vocabulary
As you can see, touch can create more than one file at the same time. We could have created all of them on one line, if we wanted to, but this is more readable.
mv
| what it does: | moves or renames files or directories |
|---|---|
| syntax: | mv <source/path> <destination/path> |
How would you move the geometry file in the math directory? The answer is:
mv lessons/language/geometry lessons/math/
Let's also move the other file that is in the wrong directory, but we also want to change its name to title case. We use mv again, with the slight difference that we specify the new name in the <destination> path:
mv lessons/math/grammar lessons/language/Grammar
We use mv to move files, but we can also move directories with it. You just have to remember that the last element in the <source> path is the one moved, which can be either a file or a directory. Let's say that we want to create a subjects directory at the same level with lessons and move math in it. How would you do that?:
mkdir subjects
mv lessons/math subjects
Did you notice something? math is moved into subjects, because subjects already exists. If it didn't, math would be renamed to subjects. To summarize, we use mv when we want to move or rename a file or a directory.
cp
| what is does: | copies files or directories |
|---|---|
| syntax: | cp <options> <source/path> <destination/path> |
For example, we moved math from lessons to subjects, but we also want it in lessons. Let's copy it back:
cp -r subjects/math lessons/
As you can see, the syntax for cp is the same as the one for mv. A difference is that for directories, we need to use the -r option, which stands for "recursive". This tells cp to copy the directory and all its contents. When copying, we can also give a new name to the destination file or directory. For example, to have a version of Grammar spelled with lower case, we do:
cp lessons/language/Grammar lessons/language/grammar
ln
| what it does: | creates links (shortcuts) |
|---|---|
| syntax: | ln <options> <source/path> <destination/path> |
One very useful feature is the ability to create a shortcut for a file or a directory. In Linux this is called a symbolic link or symlink. To create a symlink, we use the ln command or, more specifically, ln -s. There are other types of links, so -s specifies a symlink, the only one we care about for now. Let's create a symlink for the grammar file directly in lessons, so that we don't have to go into lessons/language/ every time we want to read it:
ln -s lessons/language/grammar lessons/
We can check if the file was created using ls -l. This also shows us the file type (the left-most l in the first column stands for link) and the file that it links to.
rm
| what it does: | deletes files and directories |
|---|---|
| syntax: | rm <options> <path/to/file> |
To remove the Grammar file, we run rm lessons/language/Grammar. If we want to remove a directory, we need to use the -r option again. So, if we decide we don't need the subjects directory, we do rm -r subjects.
Remember one useful trick here. To make sure that you're deleting exactly what you want and not something else, first run echo path/to/file. This should show you the path or paths that you expect to see. After that, you can press the "up" arrow key, which should bring back the command last ran and you can replace echo with rm.
There is one other thing to keep in mind: if you delete the source of a symlink, the symlink won't be usable anymore, which makes sense since there's nothing left to point to.
Looking for files
We've learned to manipulate files and directories, look in them, but what if we want to search for particular files. We have two different situations here:
- we know the name or part of the name of the file, but we don't know where it is
- we know one or more letters or words in the file content, but we don't know the name or where it is
find
| what it does: | finds files or directories |
|---|---|
| syntax: | find <path/to/look/in> <options> <arguments> |
Let's say we know that the file should be in our home directory, but don't know exactly where, and we also know the file name is .bashrc. To search it, we run:
find ~/ -name ".bashrc"
One thing you should remember is that what you put after -name should be between quotes. If you're looking for a directory, you need to specify that by using the -type option:
find /var -type d -name "log"
As you can see, if you have multiple options with their arguments, you can separate them with spaces. Another thing to notice is that, if it doesn't have access to a directory, find tells us by printing Permission denied. Also, find searches recursively. That means that it will go through a directory and if it finds other subdirectories, it will go through them as well, moving towards the bottom of the tree until there are no more subdirectories.
If you don't remember the full name, you can use * as a placeholder for the missing part. For example, we know we're looking for a file that has "bash" in the name, but that's it. We can then run:
find ~/ -name "*bash*"
This will give us more files, including the one we're looking for.
grep
| what it does: | searches for text in files |
|---|---|
| syntax: | grep <path/to/look/in> -e <search query> <options> |
To find all the files in a directory and its subdirectories that have certain letters or words, we use grep . -re "<letters>". First, let's create a file to test with:
echo "words and other things" > ~/lost_file
Of course, now we know where the file is, but let's pretend we didn't. We know it's somewhere in /home, so let's look for it:
grep /home -re "words"
You might get more than one result depending on what other files you have in /home. Notice that grep shows us the name of the file and the line where our search query is found. If we just want the file name, we can use the -l option, like so:
grep /home -rle "words"
Even though we are gluing the different options together, it's important that the -e option is last, because it's the one that specifies the search query and it expects this search query to come after it. If an option doesn't expect an argument after it, like -l or -r, then the order doesn't matter.
grep is very versatile and has a lot of options. For example, if we want to search only in files that have a certain extension, we can use the --include option. To search for files whose names end in "py", we do:
grep /home -re "words" --include="*py"
If we want to ignore those files, we use --exclude. We can also exclude an entire directory by using --exclude-dir:
grep /home -re "words" --exclude-dir="Documents"
grep has many other options, but these should do for now. If want to discover them, you can run man grep in the terminal. This will open the manual page with less, so remember that you use k for up, j for down and q to quit.
Archiving files and directories
When your files and directories grow in size and/or number, you want to archive and compress them to save space, even more so if you're planning on moving them over the Internet and don't have a high-speed connection.
tar
| what it does: | creates an archive |
|---|---|
| syntax: | tar <options> <arguments> <path/to/file/or/dir> |
The program that we use on Linux to create archives is called tar, which comes from "tape archive". tar offers us the possibility of choosing from several compression formats: gzip, bzip2, lzip, etc., each one specified by a different option. To create an archive and compress the subjects dir in the gzip format, we run:
tar -czf subjects.tgz subjects
To explain the options, c stands for create, z for the gzip format and f for the name of the archive file. Because f takes an argument, it has to be the last option in the group, as I mentioned before. If we want to decompress an archive, we use the x (from "extract") option:
tar -xzf <archive_name>
If you want to know the options you can use to specify the other formats, run man tar and look in the man page. Remember, you navigate that page with j and k and exit with q.
unzip
| what it does: | extracts the files from a ZIP archive |
|---|---|
| syntax: | unzip <path/to/archive> |
There is a possibility that you receive an archive in the zip format. In that case you can use unzip:
unzip <archive_name.zip>
Managing processes and services
First, I should explain what a process is, in case you're not familiar. To put it in simple terms, when you run a program, the operating system creats a process for that program, so a process is an instance of a program. This is the OS's way of managing the program. When the program finishes, the process stops. To learn more about the concept, visit the process wiki page.
A service is an operating system's way of managing a long-running process. Examples of such processes are web servers like nginx and Apache and database servers like PostgreSQL. Services are usually started by the OS when the computer starts.
It's useful to know about processes and how to manage them, because you work with them all the time. For example, you want to check if a process is running before starting a new one. Another case is when the program has become unresponsive and you want to kill the process.
ps
| what it does: | lists running processes |
|---|---|
| syntax: | ps <options> |
To print all running processes, you use ps aux. This is a pretty long list, so you usually want to trim it down to get the information that you need. For that, you use grep and pipes. A pipe, just like the name implies, pipes the output from one program into the input of another program. For example:
ps aux | grep "python"
first runs ps aux. The output of this command is passed to grep, which searches for the string "python". If you have any running process with "python" in the command, they will show up in the output. If not, you will only see one line, because the command that you just ran also appears in the output.
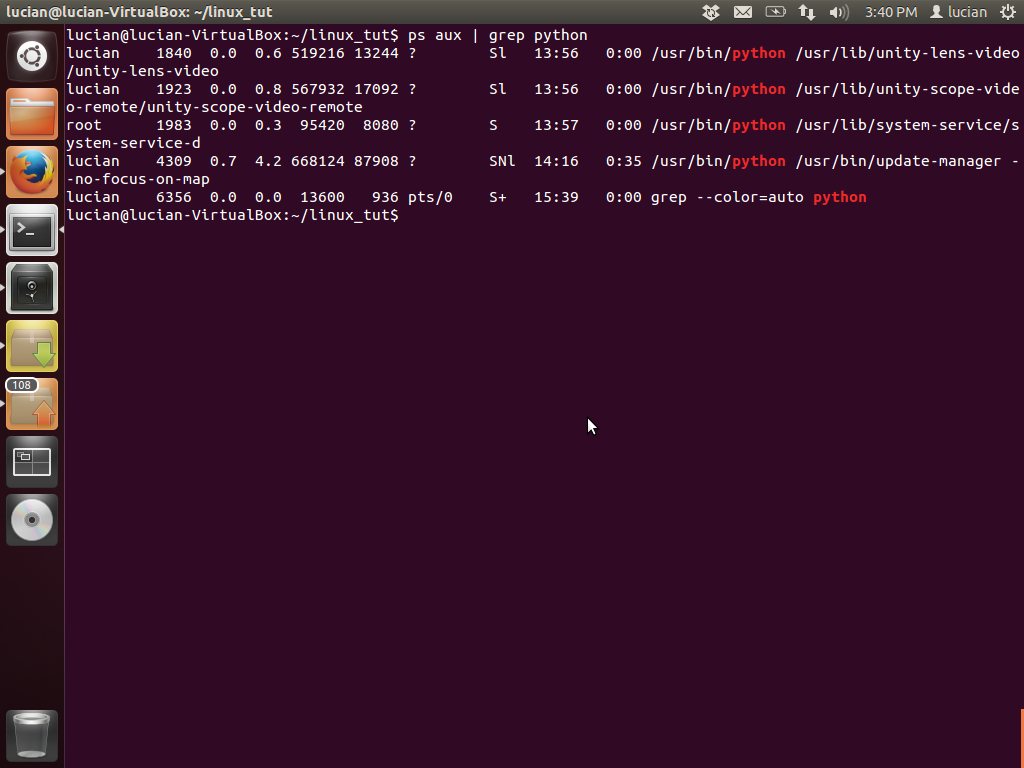
Let's talk about the output to understand it. The first column shows the user running the process. Every process must be ran by a user. Next column shows the process id or pid. This is useful for several different things, including for killing the process. Next columns aren't so important, except for the last column which shows the actual command ran to start the process.
Ctrl-Z
| what it does: | pauses a process |
|---|---|
| syntax: | None |
Sometimes you want to pause a process instead of killing it, for example when you want to move a process from the foreground to the background. To do that, you simply use the key combination Ctrl-Z, meaning you press Ctrl and Z at the same time. To try it out, enter the Python interpreter by running python. Then, when you press Ctrl-Z, you will see a message saying that the process is stopped and you are shown the terminal prompt.

fg
| what it does: | resumes a paused process in the foreground |
|---|---|
| syntax: | fg |
After you paused a process, you have two options. The first one is to resume the process in the foreground, like it was when you started it. To do that, you simply run fg. After you pressed Enter, you will be shown the name of the process. You need to press Enter again for the process to actually resume.
bg
| what it does: | resumes a paused process in the background |
|---|---|
| syntax: | bg |
When the process is paused, we can put it in the background by running bg. After running the command, you should see something like this [1]+ python &. At the same time, the terminal prompt should appear, so you can type commands again. Meanwhile, our process is running in the background. That's not very useful in our case, because the python interpreter expects commands from us, but if you had a script that took a long time, you could run that in the background while doing something else in the terminal.
I want to mention something else. There is a way to start a process so that it runs directly in the background. To do that, you append & to the command that you run to start the process. For example, to start a Python interpreter in the background, you run:
python &
jobs
| what it does: | displays processes running in the background |
|---|---|
| syntax: | jobs |
If you don't know or remember what processes you have running in the background, you can check by running jobs. If you have more than one process, you can refer to it by using the number in the brackets. To bring job number 2 in the foreground, you run fg 2.
kill
| what it does: | kills a process |
|---|---|
| syntax: | kill <options> <pid> |
As I mentioned before, sometimes you want to kill a process, because there's no other way to stop it. Let's kill the Python process that we started earlier. First, we need to get its pid (process id). Do you remember the command that we use for that? It's ps aux | grep "python". If you have several lines, look for the one that just has python in the last column, and then get the pid from the second column. In my case, the process id is 8237, so to kill the process, I run kill 8237. The command doesn't have any output, but if I try to bring in the foreground the process, I get a message saying that the process was terminated.
What I said earlier about referring to background processes by using the number in the brackets applies to kill as well, except you need to use % in front of the number. To kill job number 1, I run kill %1.
service
| what it does: | controls a service |
|---|---|
| syntax: | service <service_name> <command> |
As I said, a service manages a long-running process and is usually started by the OS at boot time. One example of a service is the one that manages the nginx server. Let's say you made some changes to nginx's configuration files. You need to restart the process for the changes to take effect. For that, you run:
sudo service nginx restart
I'll talk more about sudo below, but for now you need to know that it gives the right to run the service command, because this command can't be run by normal users. You can also stop the service by running:
sudo service nginx stop
and then start it, by using:
sudo service nginx start
You can also make your own services, but I won't go into that here, because it's beyond the scope of this course.
Installing packages and using PPAs
If you're only used to Windows or Mac OS X, you install programs by downloading an installer, running it and clicking "Next" until you're done. You can do that in Linux too, but a lot of programs can be installed with one command, because they've been made accessible by the OS maintainers. Btw, another word for "program" is "package", which is what I'll use from now on.
sudo and the superuser
Before I talk more about that, however, I have to introduce another concept: the superuser. As the name suggests, the superuser, just like Superman, has unlimited powers over the system. It can create, modify, delete users, change permissions on any file they wish, modify any file and directory and so on. The superuser can also change the ownership of a file or directory, an action that a normal user can't perform.
Your user should have superuser powers, if you created it when you installed the operating system. They're not on by default in order to prevent you from doing damage to your system ("OMG! I just deleted all my files!!!"), but you can enable them by using the sudo command, which stands for "superuser do". When you want to run a command for which you need superuser powers, you prefix that command with sudo.
Tip
A lot of times you run a command and then you realize that you needed to run it with sudo. To rerun the last command with sudo in front, you use sudo !!. !! gives you the last ran command.
apt-get
| what is does: | installs a package |
|---|---|
| syntax: | apt-get install <package_name> |
I mentioned all this, because only the superuser can install packages in the default location. So, to install the vim editor, we run:
sudo apt-get install vim
You might be asked if you are sure you want to install the program. In that case, just press y and Enter. After the install finished, vim is accessible.
add-apt-repository
| what it does: | adds a PPA |
|---|---|
| syntax: | add-apt-repository <ppa_name> |
When I said why packages can be installed on Linux with one command, I said that the reason is that the OS maintainers made the package accessible. That means that they put it in a repository that Ubuntu and apt-get know about. There is one disadvantage: these packages are usually older, because older versions are more stable since they've been used more. Sometimes you want to use a new version though and this is were PPAs come in. Basically, there is another repository where people can put their PPAs that usually contain the latest version of a package. To use the PPA, you have to add its address and then install the package. To do that, you use add-apt-repository.
Let's say you want to use the latest version of PostgreSQL. First, you google for postgres ppa and on the first result you should find the PPA address. Then you run:
sudo add-apt-repository ppa:pitti/postgresql
sudo apt-get update
sudo apt-get install postgresql
Managing files/directories permissions and ownership
Permissions
When we used ls -l, we said that we care about columns 1, 3 and 4. You can run ls -l ~/ to remember what we're talking about. Column 1 shows a file's type and its permissions and it looks like this:
lrwxr-xr-x
If we leave out the first character, which shows the file type, we have 9 characters for the file permissions. We can split these into three different blocks and it will be a lot easier to remember. The three blocks are:
- user
- group
- others
l | rwx | r-x | r-x
user refers to the user who owns the file (column 3). group refers to the group who owns the file (column 4). others refers to any other user or group on the system. The permissions are also of three types:
- read (r)
- write (w)
- execute (x)
We see that each block either has the letter specifying the permissions or -. That means it doesn't have the permission that should be in that place. If a file doesn't have the w permission in the "user" block, then the user can't modify the file. If a file doesn't have the r permission in the "others" block, then no one but the owner user and group members can look in the file. What do these permissions mean for example rwxr--r-x?
chmod
| what it does: | changes permissions on a file/directory |
|---|---|
| syntax: | chmod [ugo][-+][rwx] path/to/file/ |
Now that we know what the permissions are, let's learn how to change them. For that, we use chmod which stands for "change file mode bits". We can change the permissions for us -- the user who owns the file --, for the group or for others. The square brackets in the syntax above mean that we choose one option from them when we run the command. For example:
- chmod u+x file: we give ourselves the execute permission
- chmod u-x file: we deny ourselves the execute permission
- chmod g+w file: we give the group the write permission
- chmod g-w file: we deny the group the write permission
You can give and deny the others the read permission on a file as an exercise.
chown
| what it does: | changes user owner of a file/directory |
|---|---|
| syntax: | chown <user> <path/to/file> |
After talking about permissions, let's talk about ownership. Sometimes we want to change the user or the group who owns a file or a directory. To do that, we use chown. Let's say you want to make the root user owner of a directory. First we create the directory and check that our user is the owner:
mkdir ~/foreign
ls -l ~/
Then we change the owner:
sudo chown root ~/foreign
You can now check that the owner of the directory changed.
chgrp
| what it does: | changes group owner of a file/directory |
|---|---|
| syntax: | chgrp <group> <path/to/file> |
For example:
sudo chgrp root ~/foreign
You can check again to see that the group changed.
Managing users
Sometimes you need extra users: either you need to give someone access to the system or you want to have your program be run by its own user. It's a good idea to give its own user to a person or a long running program like a web server, because it allows you to decide what they can and can't do. If their access is limited, their damage potential is limited and you always want to limit the damage potential.
adduser
| what it does: | creates an OS user |
|---|---|
| syntax: | adduser <username> |
Let's say I have a friend named Tim who uses my computer from time to time, and I want to give him his own user, so that he can't make changes to my files. To add a user, I run:
sudo adduser tim
and I am prompted for a password. The other information, like name and room number, is optional, so you don't have to enter it. To check that the new user was created, you can look in /home and you will see a directory for the new user. You can also login as the new user.
If I decide to give Tim administrator rights so he can use sudo, I need to add him to the sudo group. To do that, I run:
sudo adduser tim sudo
I can add him to other groups by replacing sudo with the group name.
deluser
| what it does: | removes user from group OR deletes user |
|---|---|
| syntax: | deluser <username> <groupname> |
If I decide I want to take back Tim's administrator rights, I run:
sudo deluser tim sudo
There's one thing to be careful here. If you run the command without entering the group name, you will delete the user. Finally, I decide to remove Tim's user, because he got his own computer and he doesn't need to use mine anymore:
sudo deluser tim
If I also want to remove his home directory, I use the --remove-home option:
sudo deluser tim --remove-home
If I forgot to use this option, when I deleted the user, I can manually delete the directory, just like with any other directory, by running:
rm -r /home/tim
What Next?
After reading this course, you should have the basics of working with Linux. To go further, you can read the man page of each command, to explore its functionality in greater detail. To access the page you use man followed by the command name (man grep).
You can also read about BASH, which is the environment running in the terminal. This means that every command you enter in the terminal is evaluated and ran by BASH. One thing you should realize is that there is no distinction between BASH commands and external programs. grep, for example is an external program that BASH calls for you, while time is a BASH keyword.
A good resource for BASH is Wooledge BashGuide.